Professional Product Photography Lighting Setup: A Complete Guide for Perfect Shots

Understanding Essential Lighting Components
Great product photos don't require expensive gear - they need a solid grasp of how different lighting elements work together. Just like painters use their tools to create art, photographers shape and control light to capture stunning product images. Let's explore the key components you'll need.
Key Light Sources for Product Photography
The key light (or main light) forms the foundation of your lighting setup by providing the primary illumination. You have several great options to choose from:
- Continuous Lights: Perfect for beginners since they stay on constantly, letting you see exactly how the light affects your product in real-time. They're often budget-friendly and straightforward to work with.
- Strobes (Flash Units): These deliver quick, powerful bursts of light that help freeze motion and create tack-sharp images. Many pros prefer them for their precise control over light intensity.
- Speedlights: These compact flash units blend power and portability, making them perfect for both studio work and on-location shoots.
- Natural Light: A simple window can provide beautiful, soft light that's ideal for lifestyle product shots. Don't overlook this free and effective option!
Modifying Your Light: The Role of Diffusers and Softboxes
Raw light sources often create harsh shadows - that's where light modifiers come in to help shape and control the light.
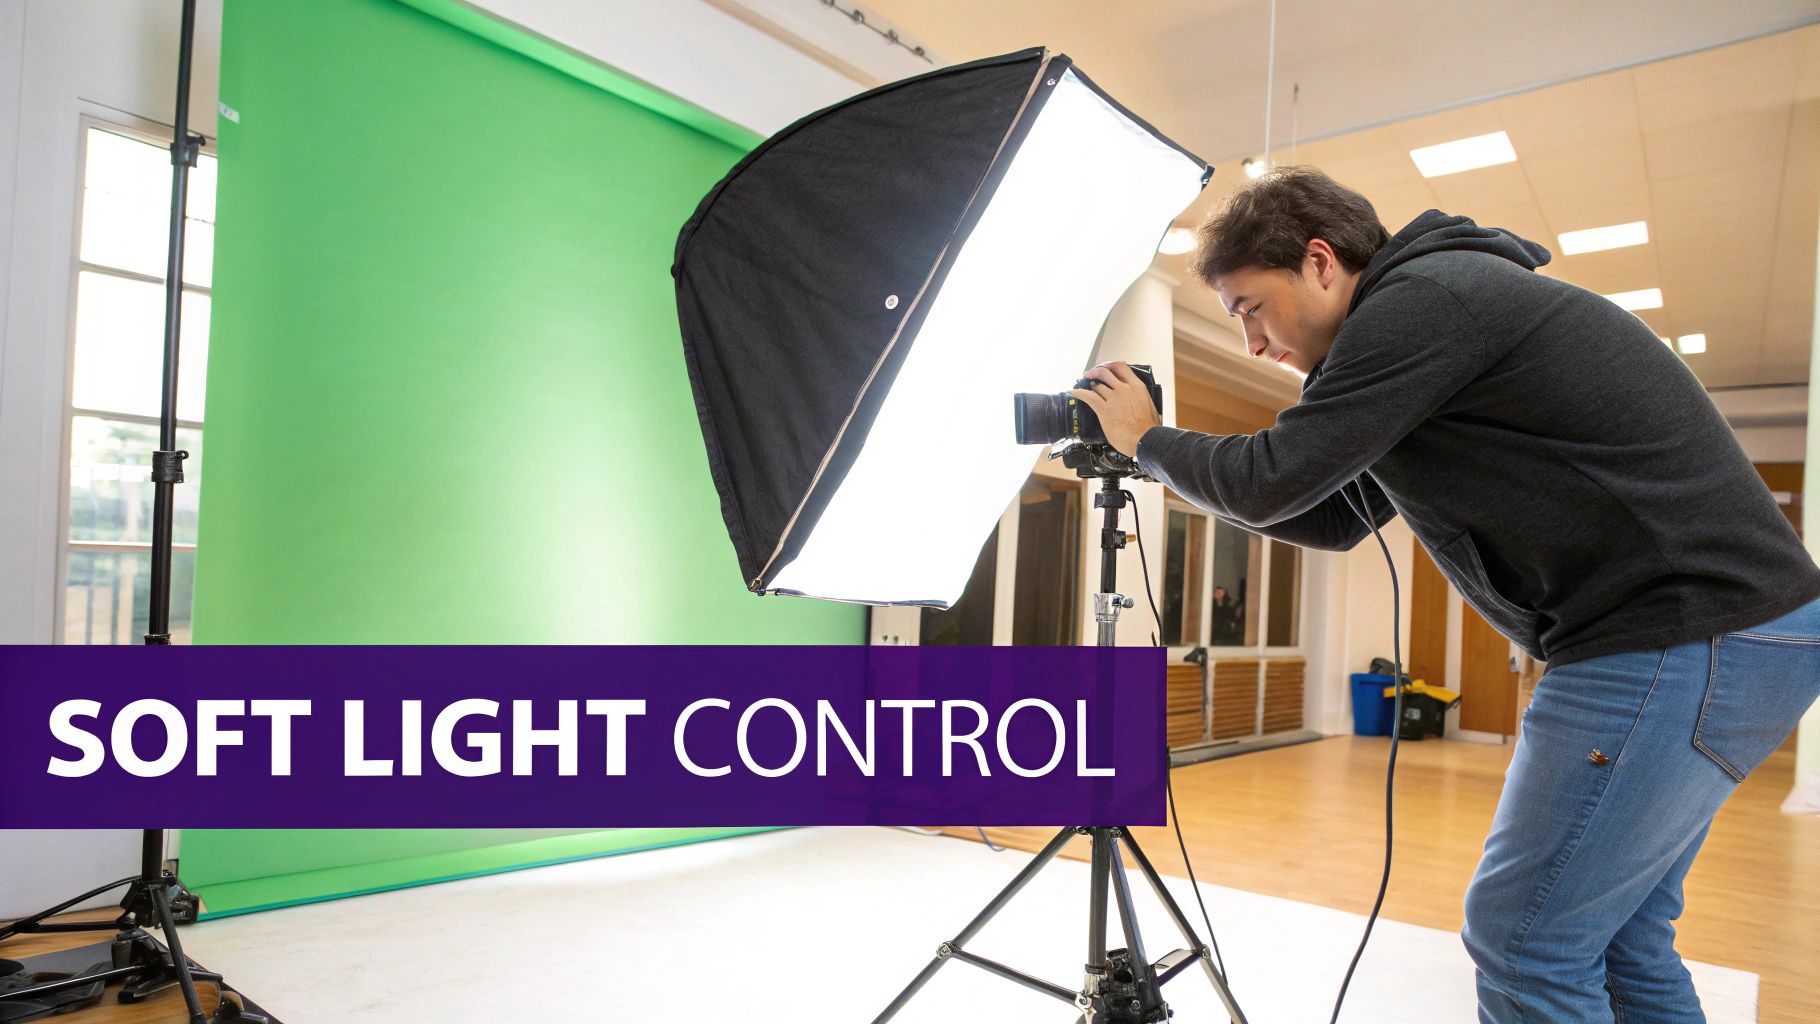
- Diffusers: These work like clouds on a sunny day, softening harsh light and spreading it more evenly across your product. They help reduce unwanted shadows and create a more polished look.
- Softboxes: Think of these as mini studios that transform harsh light into a soft, even glow. They're excellent for creating professional-looking product shots with minimal shadows.
Your choice of modifier depends on what you're shooting. For example, clothing often benefits from larger softboxes, while smaller diffusers work well for jewelry and small items.
Reflectors: Enhancing and Balancing Light
Reflectors are simple but powerful tools that bounce light back onto your subject. They help fill in shadows and add depth to your photos. Here's what different types can do:
- White Reflectors: Create natural-looking fill light without changing color temperature
- Silver Reflectors: Add brightness and a cool tone to shadows
- Gold Reflectors: Produce warm, rich fill light
- Black Reflectors: Deepen shadows to create more contrast and drama
Getting the most from reflectors is all about placement. In product photography, side lighting (placing your light source at a 90 to 130 degree angle from the camera) creates depth-enhancing shadows. For example, start with your light at 90 degrees, then slowly move it toward 130 degrees to see how the shadows change. Add a reflector on the opposite side to soften those shadows for a balanced look. Check out more lighting setup tips at Product Photography Lighting Setup.
Understanding how these basic lighting components work together helps you create stunning product photos, even with basic equipment. Master these fundamentals, and you'll be well on your way to capturing images that make your products shine and boost your sales.
Mastering Natural Light Product Photography
Natural light is a powerful tool for creating beautiful product photos without expensive equipment. By understanding how to work with window light and a few basic tools, you can capture professional-quality images that showcase your products at their best. The best part? This approach is perfect for photographers just starting out, since it requires minimal investment.
Finding the Sweet Spot: Identifying Ideal Shooting Locations
The key to great natural light photos starts with finding the right spot to shoot. A window is your best friend here - but not just any window will do. North-facing windows are especially valuable since they provide steady, even light throughout the day without harsh shadows. For example, if you're photographing a collection of skincare products and need consistent lighting across all items, set up near a north-facing window. The bigger the window, the more light you'll have to work with.
Timing is Everything: Shooting During Optimal Lighting Conditions
Light quality changes dramatically throughout the day, which directly impacts your photos. Bright midday sun can create unflattering harsh shadows, while cloudy days offer beautiful soft light that flatters most products. The magic happens during the "golden hour" - those precious moments just after sunrise and before sunset when the light is warm and directional. This special light can make colors pop and add gorgeous depth to your images. Since golden hour is brief, have your setup ready to go before it begins.
Shaping the Light: Using Simple Tools for Professional Results
Even the best natural light sometimes needs a little help. Simple tools can make a big difference in your final images. A diffuser like a sheer curtain softens harsh sunlight, while reflectors - even something as basic as white cardboard - bounce light back onto your product to brighten shadows. For instance, if one side of your product looks too dark, position a white foam board opposite your light source to reflect light into those shadows. These tools are affordable yet incredibly effective for creating balanced, professional-looking photos. Learn more techniques from this guide to e-commerce product photography lighting.
Maintaining Consistency: Creating Repeatable Setups
Natural light's changing nature can make consistency tricky, but it's not impossible. Keep detailed notes about your successful setups - write down the location, time of day, weather conditions, and any tools you used. This documentation helps you recreate similar lighting for future shoots, ensuring your product images maintain a cohesive look. When your photos look consistently professional, it builds trust with customers and strengthens your brand image.
Creating Professional Studio Lighting Environments

Natural light is great for getting started, but setting up a controlled studio environment takes your product photos to new heights. Let's explore how to create a professional lighting setup that consistently produces stunning product images.
Optimizing Your Studio Space
A well-organized studio space makes all the difference in product photography. The key is creating distinct areas for shooting, storing gear, and editing - even in small spaces. For instance, modular shelving lets you quickly adjust your setup for different products. Paint walls in neutral tones to prevent color casting on your subjects. When you control these basic elements, you create a reliable foundation for experimenting with different lighting techniques.
Selecting Impactful Backgrounds
Your choice of background can make or break a product photo. A white backdrop remains popular because it creates clean, professional results that put all focus on the product. But don't be afraid to try other options - black backgrounds add drama and luxury appeal to jewelry and tech products. The key is choosing backgrounds that complement your product's features rather than competing with them.
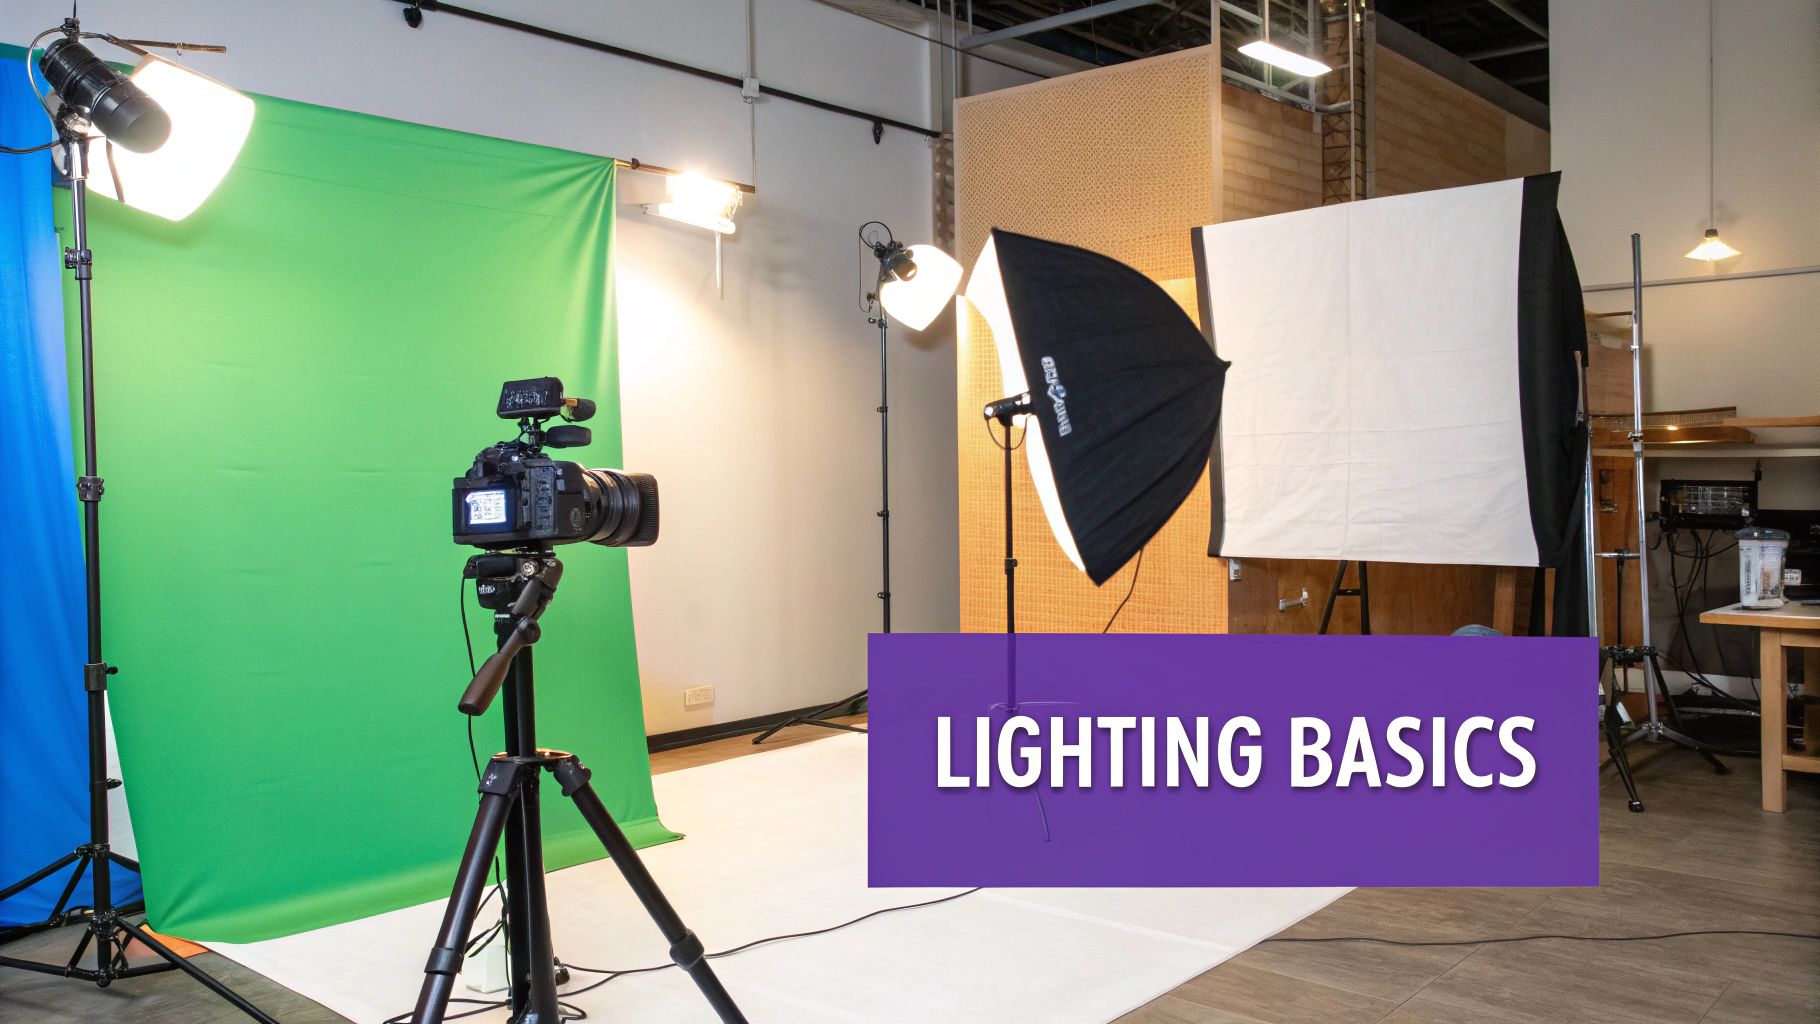
Positioning Lighting Elements for Maximum Effect
Getting your lights in the right spots is crucial for pro-level photos. The classic three-point lighting system includes a key light, fill light, and backlight. The key light shows off main product features, while the fill light softens harsh shadows. Adding a backlight separates your product from the background, creating depth. Moving these lights around and adjusting their brightness lets you craft exactly the look you want.
Modern lighting tech gives you even more control. Smart lighting systems let you fine-tune color temperature and brightness with precision. For example, pairing a white acrylic platform with a softbox creates beautiful, even lighting. You can learn more about setting up product lighting at Orbitvu's Blog.
Lighting Different Product Categories
Each type of product needs its own lighting approach. Shiny items like jewelry require soft, diffused light to avoid glare while highlighting details. For clothing, large softboxes create even lighting that shows off textures. Tech products often look best with directional lighting that emphasizes sleek design elements. Understanding these differences helps you create setups that showcase each product's best features and appeal to buyers.
Advanced Techniques for Challenging Products
Taking great photos of certain products requires specialized techniques and careful attention to detail. Products with reflective surfaces like glass and metal or delicate details like jewelry need extra consideration in your lighting setup. Let's explore how to tackle these common photography challenges.
Photographing Reflective Products: Glass and Metal
Glass and metal surfaces create unique photography challenges because they reflect everything around them. The key is to control those reflections while still highlighting the product's shape and surface qualities. Here's how to get it right:
- Soft, Diffused Lighting: Use large softboxes or diffusers to create gentle, even lighting that minimizes harsh reflections. This wraps the light around your product for a cleaner look.
- Black Flags: Place pieces of black cardboard or foam core strategically to absorb and control unwanted reflections. Think of these as light absorbers that help shape highlights and shadows.
- Polarizing Filters: Add a polarizing filter to your lens to cut down on glare, especially when shooting glass. It's an easy way to fine-tune the final look.
For instance, when shooting a glass bottle, try placing two large softboxes on either side and slightly behind it. This backlighting helps define the bottle's shape. Then use black flags to refine the highlights and control any distracting reflections.
Photographing Jewelry: Highlighting Intricate Details
Small, detailed items like jewelry need precision lighting to show off their best features. The goal is to capture fine details while managing shadows and creating appealing sparkle.
- Macro Lens: Get up close with a macro lens to showcase tiny details. This helps viewers appreciate the craftsmanship of each piece.
- Pinpoint Lighting: Direct small, focused lights at specific areas like gemstones or metalwork to create eye-catching highlights.
- White or Light-Colored Backgrounds: Keep it simple with light backgrounds that make the jewelry stand out and simplify post-processing work.
A light tent works well for small jewelry pieces too. It creates an evenly lit environment that reduces shadows and distributes light smoothly across the subject.
Troubleshooting Common Lighting Challenges
Even with careful planning, lighting issues can pop up. Here's how to fix common problems:
| Problem | Solution |
|---|---|
| Harsh Shadows | Use a diffuser, reflector, or move the light source further from the product |
| Too Much Glare | Use black flags, a polarizing filter, or adjust the light angle |
| Flat Images | Introduce a backlight or adjust the key light to create more dimension |
| Uneven Lighting | Use multiple light sources or adjust the reflector placement |
Mastering these techniques takes practice but makes a big difference in your product photos. Focus on controlling light and reflections while highlighting key product features. Remember that good lighting brings out the best in every product, making ordinary items look exceptional in photos.
Smart Solutions for Budget-Conscious Photographers
Want to create stunning product photos without spending a fortune? You'll be happy to know that professional-quality lighting doesn't require expensive equipment. With some creative thinking and smart purchasing decisions, you can build an effective setup that fits your budget.
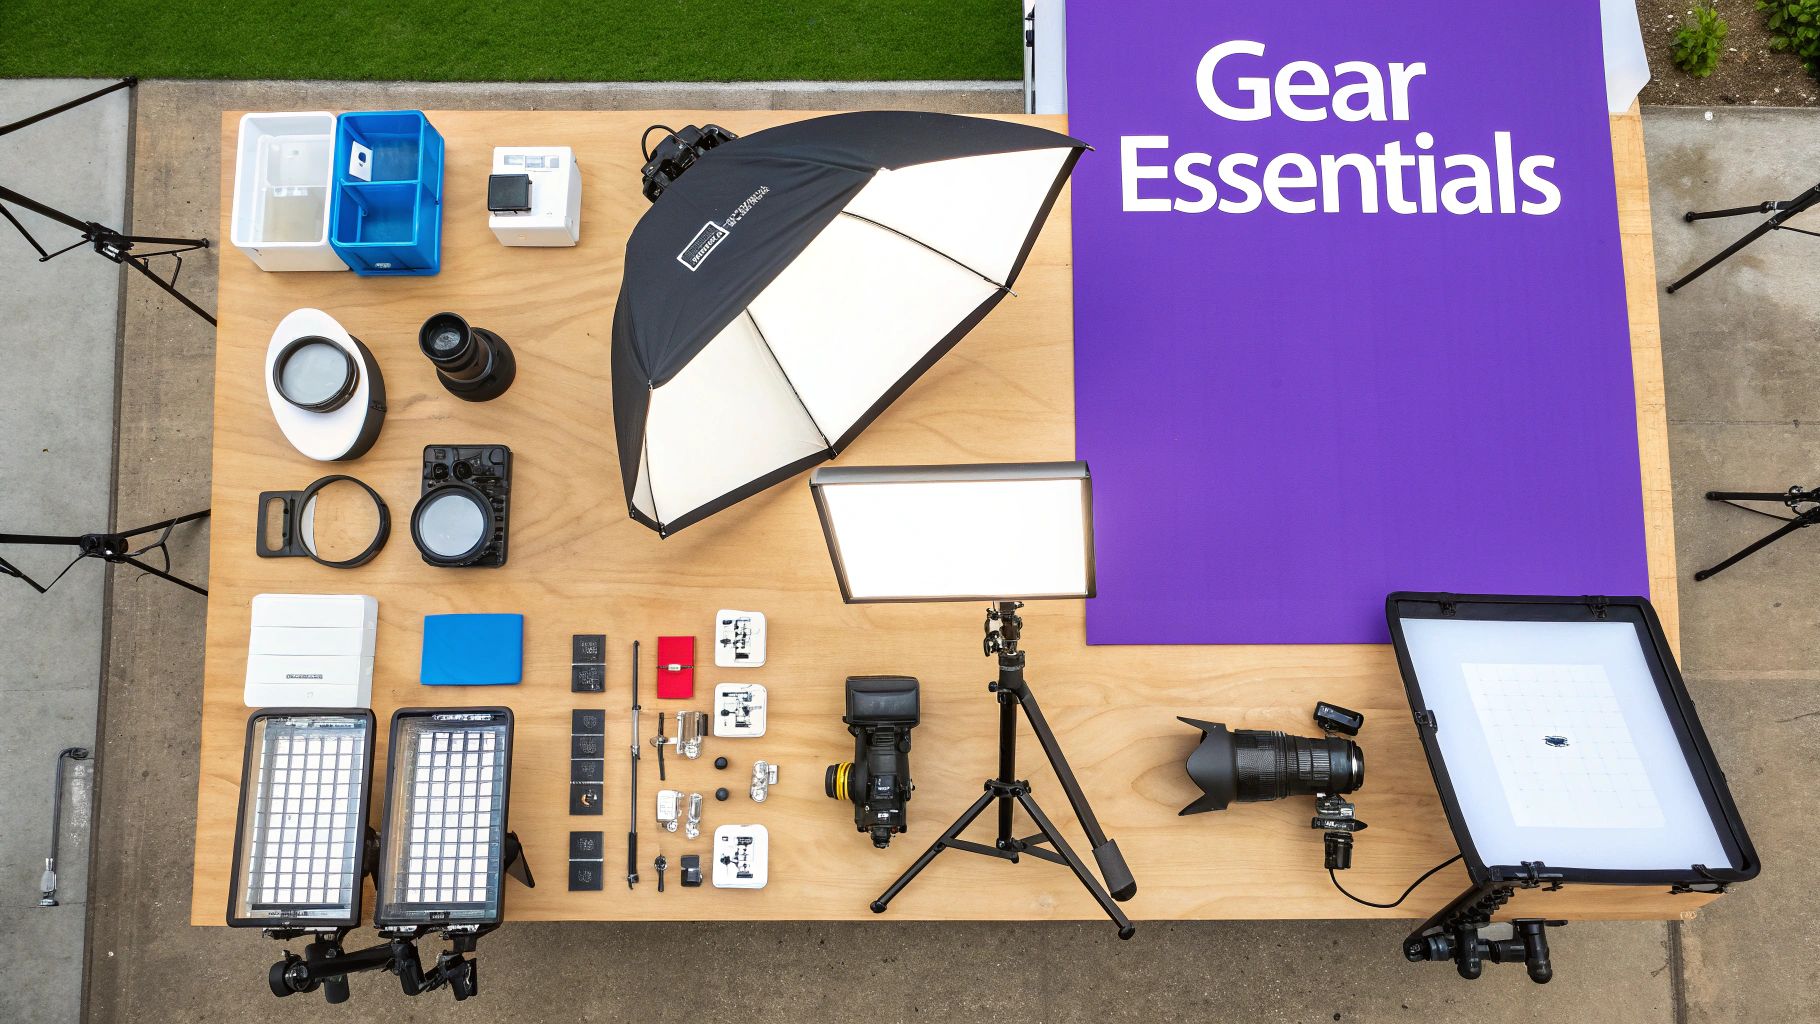
Building Your Kit Smartly: Prioritizing Essential Gear
The key is starting with fundamental pieces that give you the most value. A basic continuous light and diffuser combination can produce beautifully soft, even lighting for a fraction of what full studio setups cost. For instance, you can get great results from a simple clamp light and diffusion sock - often for less than $50 total.
DIY Solutions: Getting Creative
There's a lot you can do with everyday items. A white foam board makes an excellent reflector to bounce light and fill shadows. Common household items like sheer curtains or white paper work well as diffusers to soften harsh light sources. Testing these DIY options lets you explore different effects before investing in pricier gear.
Maximizing Your Equipment's Potential: Exploring Different Setups
Even basic equipment can create diverse lighting looks. Try adjusting the position and distance of your light source to completely change the mood. Side lighting produces dramatic shadows, while backlighting creates an ethereal glow. Take time to experiment with different angles and techniques to find what works best for your products.
Knowing When to Invest: Choosing Quality Over Quantity
While budget options are great to start, some gear is worth spending more on. A solid tripod and camera with good manual controls will noticeably improve your images and shooting efficiency. Focus on gradually upgrading the items that will have the biggest impact on your work.
Budget-Friendly Alternatives: Finding Value Without Compromise
You don't need top-end gear for great results. Affordable speedlights paired with basic softboxes or umbrellas give you powerful, controllable lighting. This setup works especially well when you need precise control over light intensity and direction.
Stretching Your Budget: Tips and Tricks
- Rent equipment: Try out studio lighting or specialty lenses without the big upfront cost
- Buy used: Look for deals on pre-owned gear, but inspect items carefully
- Join online communities: Connect with other photographers to share tips and find good deals
- Watch tutorials: Learn new techniques and DIY solutions to maximize your current equipment
With some resourcefulness and smart planning, you can build an effective product photography lighting setup that fits your budget. Remember - mastering lighting techniques matters more than having the most expensive gear.
Perfecting Your Images in Post-Production
Taking great product photos is just the first step. The magic really happens in post-production, where careful editing transforms good photos into stunning professional images that make your products shine.
Essential Post-Production Adjustments
Start with these fundamental edits that form the backbone of professional product photography:
- Brightness and Contrast: Fine-tune the overall light levels and the difference between light and dark areas to create clear, eye-catching images
- White Balance: Ensure colors appear true-to-life by removing unwanted color casts - crucial for accurate product representation
- Sharpness: Add subtle sharpening to bring out fine details without looking artificial
For example, when photographing white products like ceramic mugs, proper white balance adjustment ensures they appear pure white rather than yellowish or bluish in the final image.
Advanced Editing Techniques for Lighting
Once you've mastered the basics, these more advanced techniques give you precise control over your product lighting:
- Shadows and Highlights: Gently open up shadows to show detail while preserving depth, and tame bright highlights on reflective surfaces
- Local Adjustments: Use brushes and gradients to enhance specific areas - like brightening a dark corner or reducing glare on metal
- Color Grading: Create a cohesive look that matches your brand style through subtle color adjustments
Maintaining Consistency Across Product Series
Your product photos should look like they belong together. Here's how to ensure a uniform look:
- Create Presets: Save your favorite editing settings to quickly apply consistent adjustments across multiple photos
- Batch Processing: Edit multiple images at once to save time while maintaining quality, especially helpful for large product sets
Efficient Workflow for Time-Saving Post-Production
Smart workflow choices help you edit faster without sacrificing quality:
- Non-Destructive Editing: Work with editing software that preserves original files so you can always revisit and refine your edits
- Keyboard Shortcuts: Learn the key commands for common adjustments to speed up your editing process significantly
- Monitor Calibration: Use a properly calibrated screen to ensure colors appear correctly across different devices and in print
Even small post-production refinements can dramatically improve your product photos and help them stand out. The key is developing a consistent, efficient editing process that enhances your images while staying true to your brand style.
Ready to take your online store to new heights? Move beyond Etsy's limitations with Wand Websites. We'll help you build a professional e-commerce site that showcases your products beautifully and drives more sales.
